
How To Start Designing a RC Airplane in Fusion 360
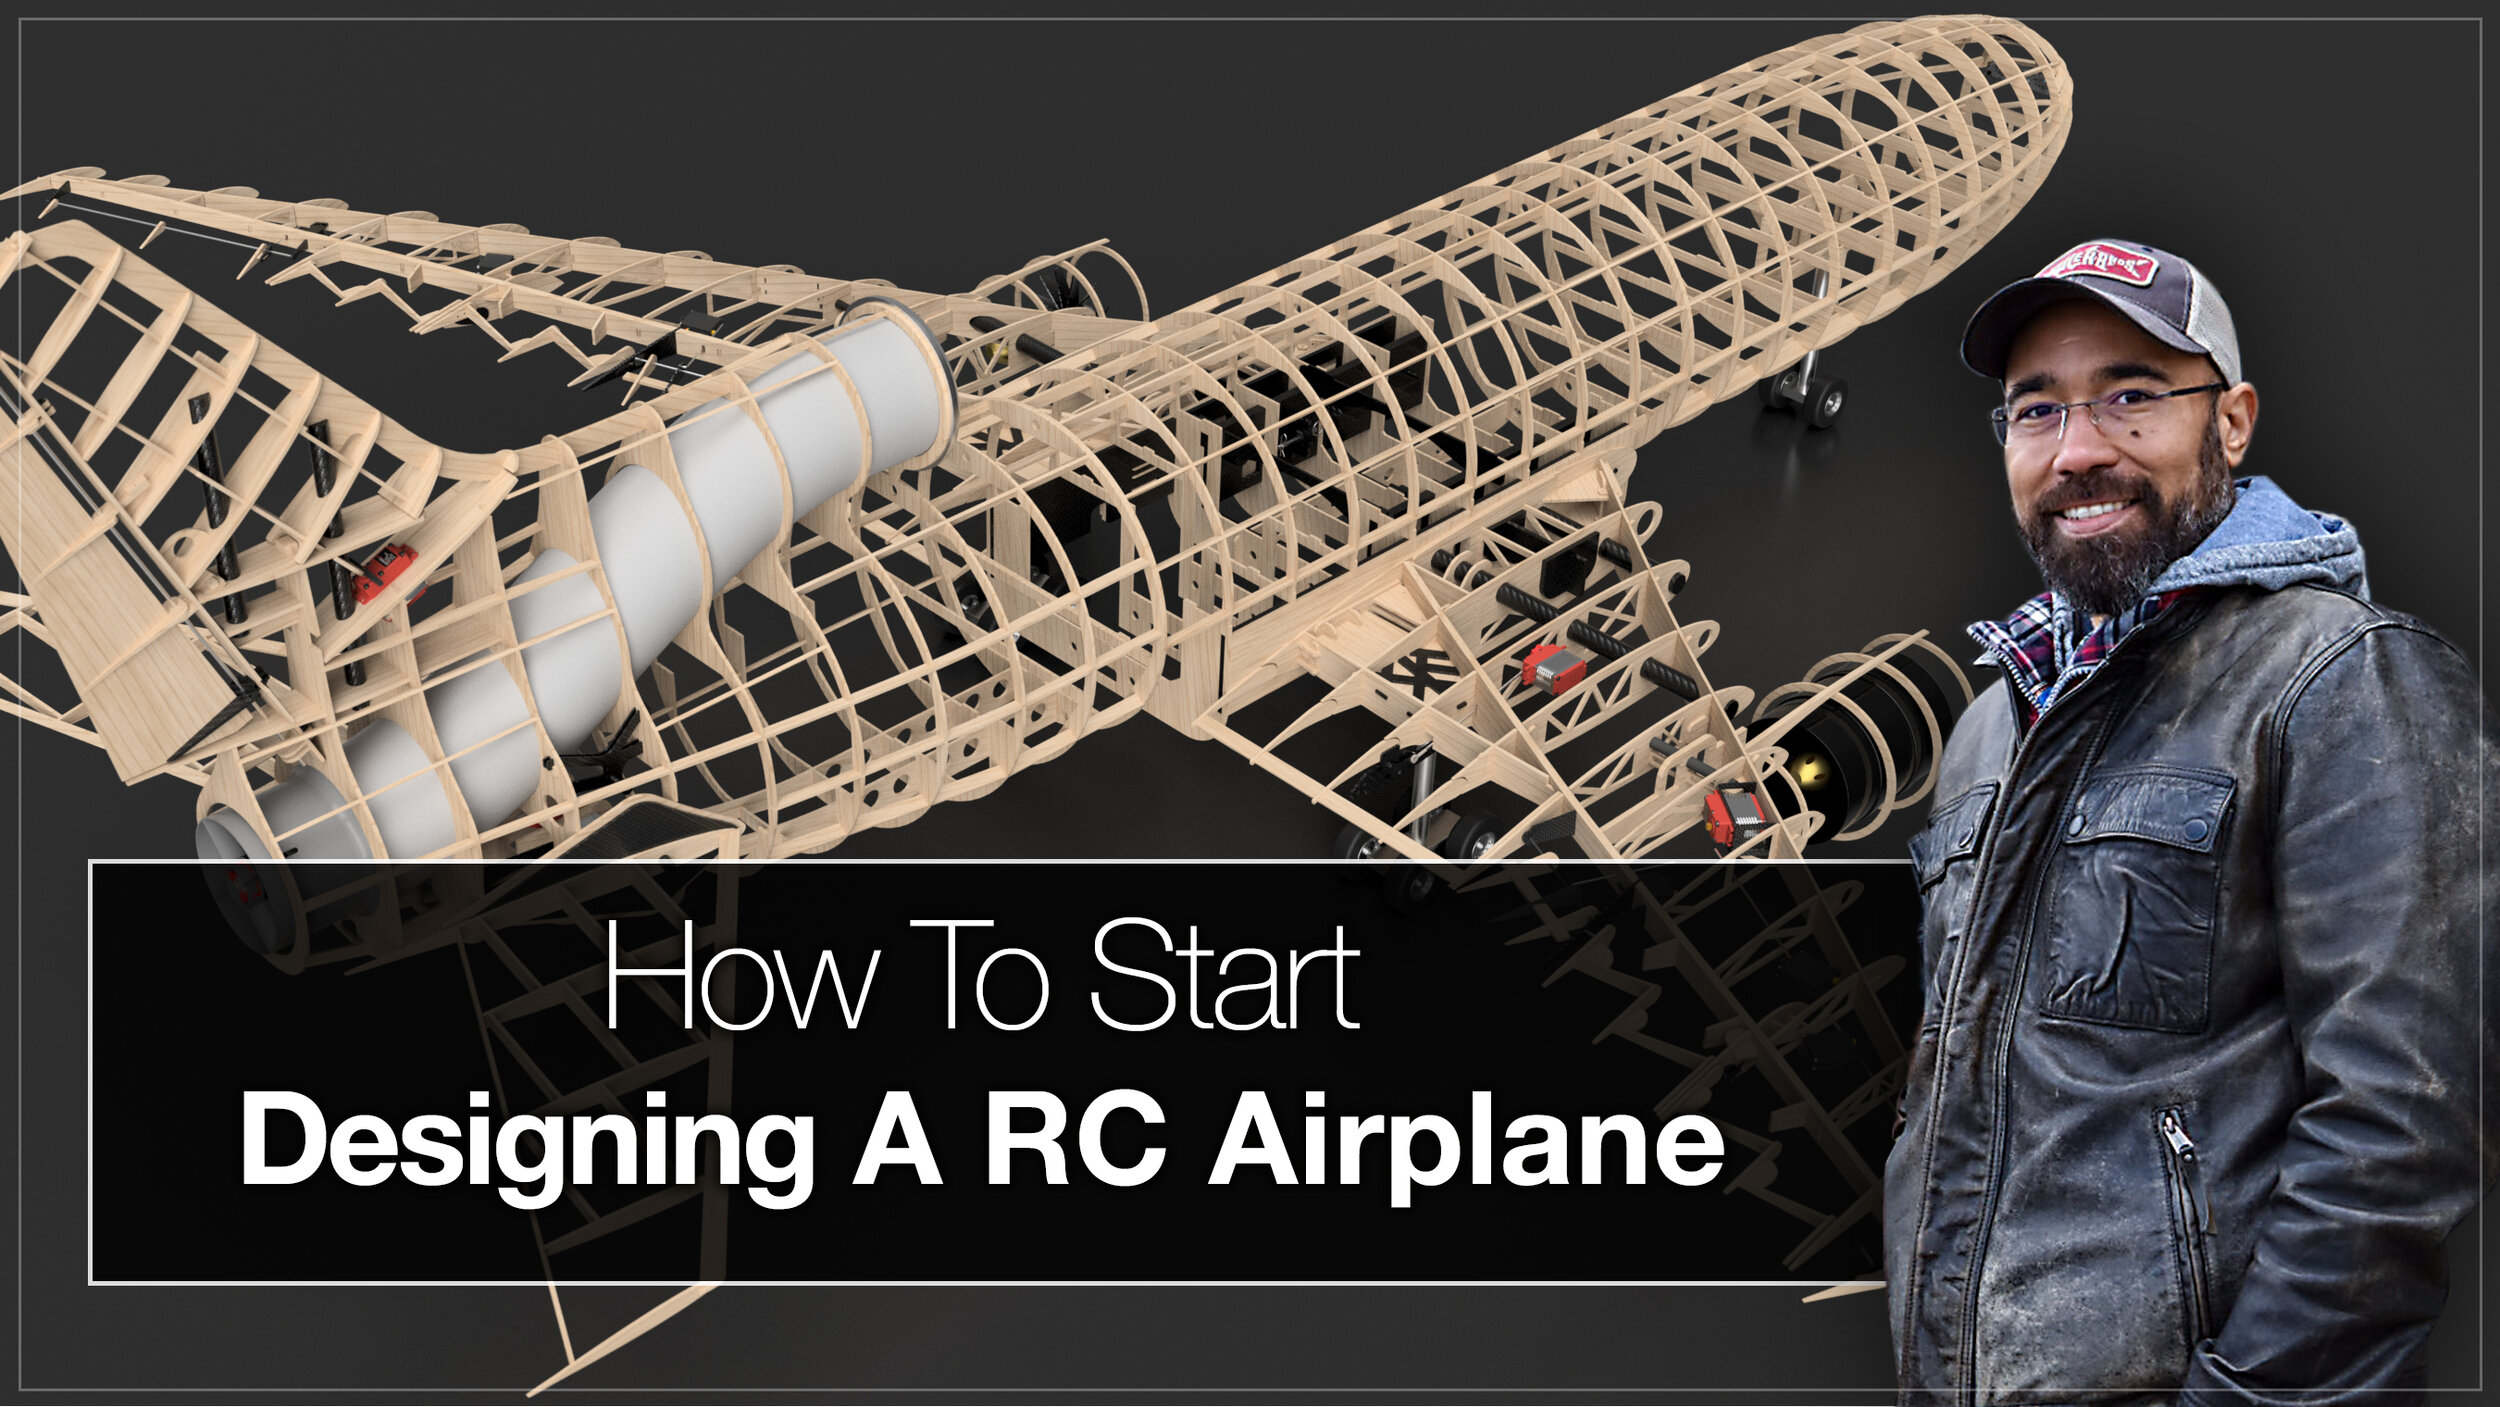
Episode 1
In this very first episode, I introduce you to some of the basics of the CAD software Fusion 360 and how I used it to go from a “blank sheet”, so to speak, to a fully framed RC airplane model based on the classic and ground breaking L-1011 Airliner.
*This is not an in depth tutorial of how to use Fusion 360, rather an overview of some of the key features I used to create the 3D model of my current build project, the L-1011.
Working with CAD software in the beginning, for some, can be a very intimidating experience. If you have seen some of the renderings I’ve posted here or on instagram, its easy to get overwhelmed with the details. I assure you, it’s not that difficult. If anything, it’s just very time consuming and requires patience.
Remember, airliners require small armies of aerospace engineers, designers, electronics experts, and a whole host of other specialists years to develop, so take a breath and go one step at a time. With a little vision, drive and patience you to can design any airliner, jet fighter, glider, GA aircraft, warbird, private jet, or a one of a kind plane right out of your imagination.
It’s one thing to buy an off the shelf kit, or ready to fly RC airplane, but for many of us aviation geeks with a mind for engineering and design, we want to start from scratch to test ourselves and see if we have the chops to create, build and fly a model RC airplane. Obviously this is the route I chose to take.
Though I am not a mechanical or aerospace engineer, my mind is very much wired for engineering. Writing software for a living makes me think in parts and components and how they relate to each other. Designing this plane, turning virtual engineering space into the physical world is what drives me to see this first project through.
I hope you enjoy my first “How To…” video and you learn something that will help you. Below you will also find brief descriptions of the Key Concepts I cover in this video.
Outline
0:00 Welcome to RC CAD2V
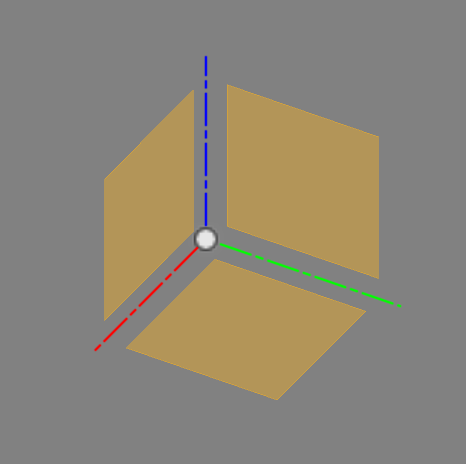
1:00 Understanding Axis and 3D Workspace - X Y Z
2:18 Set Up Your Airplane Diagrams Using Canvases
7:21 Start the Fuselage using Sketch Feature
11:11 Extrude a Fuselage Former from a Sketch Shape
13:41 Create Center Fuselage with Patter Tool
16:14 Modify an Existing Body
18:52 Setting up Center Construction (For Symmetry)
20:19 Using Mirror Tool with a Construction Plane
23:04 Next Episode Teaser
Key Concepts
Axis
If you have never worked in CAD, the first thing to understand is that you will be working in a virtual 3-Dimensional workspace. What this means is all of your work is done on 3 axis. The Z axis, usually used as the height of an object. The Y Axis which is used as the depth dimension. Lastly, the X axis, which is the width of your objects. Any design you create will have a center point. This point is known as the origin point and every object your create will be in relation to this point.
Sketching
You can certainly start creating objects within seconds of the interface launching, which is great. But when you need precision and accuracy and the flexibility to make changes on the fly, sketch is where you want to start. Sketch, in Fusion 360, is what it sounds like. It’s the digital version of sketching out a design on a sheet of paper. With this powerful tool you can create very exacting 2 dimensional “diagrams” and then extrude them into 3D space.
Bodies & Components
In Fusion 360, the objects you create are “Bodies”. For a complex design, you can have many hundreds, if not thousands of bodies. Bodies are then organized together to form components. It is in good practice to name your bodies and components with logical names to help you identify them quickly as your design grows. It’s also wise to not make your bodies too complicated, use multiple bodies and join them together to form components.
Canvas
Canvases are a way for you to bring an image into your workspace. This can be extremely useful when you are trying to create a scaled model from a diagram or an existing object. This tool can help you recreate just about object or design. Learning how to use the canvas tool was absolutely fundamental to my design, and through my video you will see why this tool is so important when creating an aircraft model.
Patterns
No one likes creating the same object over and over again. Not only is doing it manually prone to inaccuracies, it’s also not the smart way to do things in Fusion 360. For shapes you want to duplicate, learning how to use the pattern tool. It will save you a ton of time and frustration. The pattern tool is very simple to use, but incredibly useful.
Construction Planes
In this episode I show the basics of what and how to use a construction plane. A construction plane is a flat surface that you can use to create shapes from, cut bodies, alight objects, create mirroring object, and much more. Construction planes are not bound to the X Y Z axis, you can create a construction plane of almost any size and at any angle. Learning to use them will be very helpful and save you a significant amount of heartache.
Mirroring
When you’re creating designs such as an airplane or any other aerospace machine for that matter, perfect symmetry is of utmost importance. This is where the mirroring tool comes in handy. Instead of designing and tweaking and then attempting to match two sides perfectly, you can design and make modifications to one side, then mirror it to the other. Be sure to use the mirror tool frequently, it will save you ensure your designs stay symmetrical and when combined with construction planes, you’ll wonder how anyone could ever do without it.