
The Model Airliner’s Forward Fuselage Section
The Build Part 2
About This Model Airplane Build Episode
In this episode I assemble the forward fuselage of the 1:20th scale L-1011 airliner.
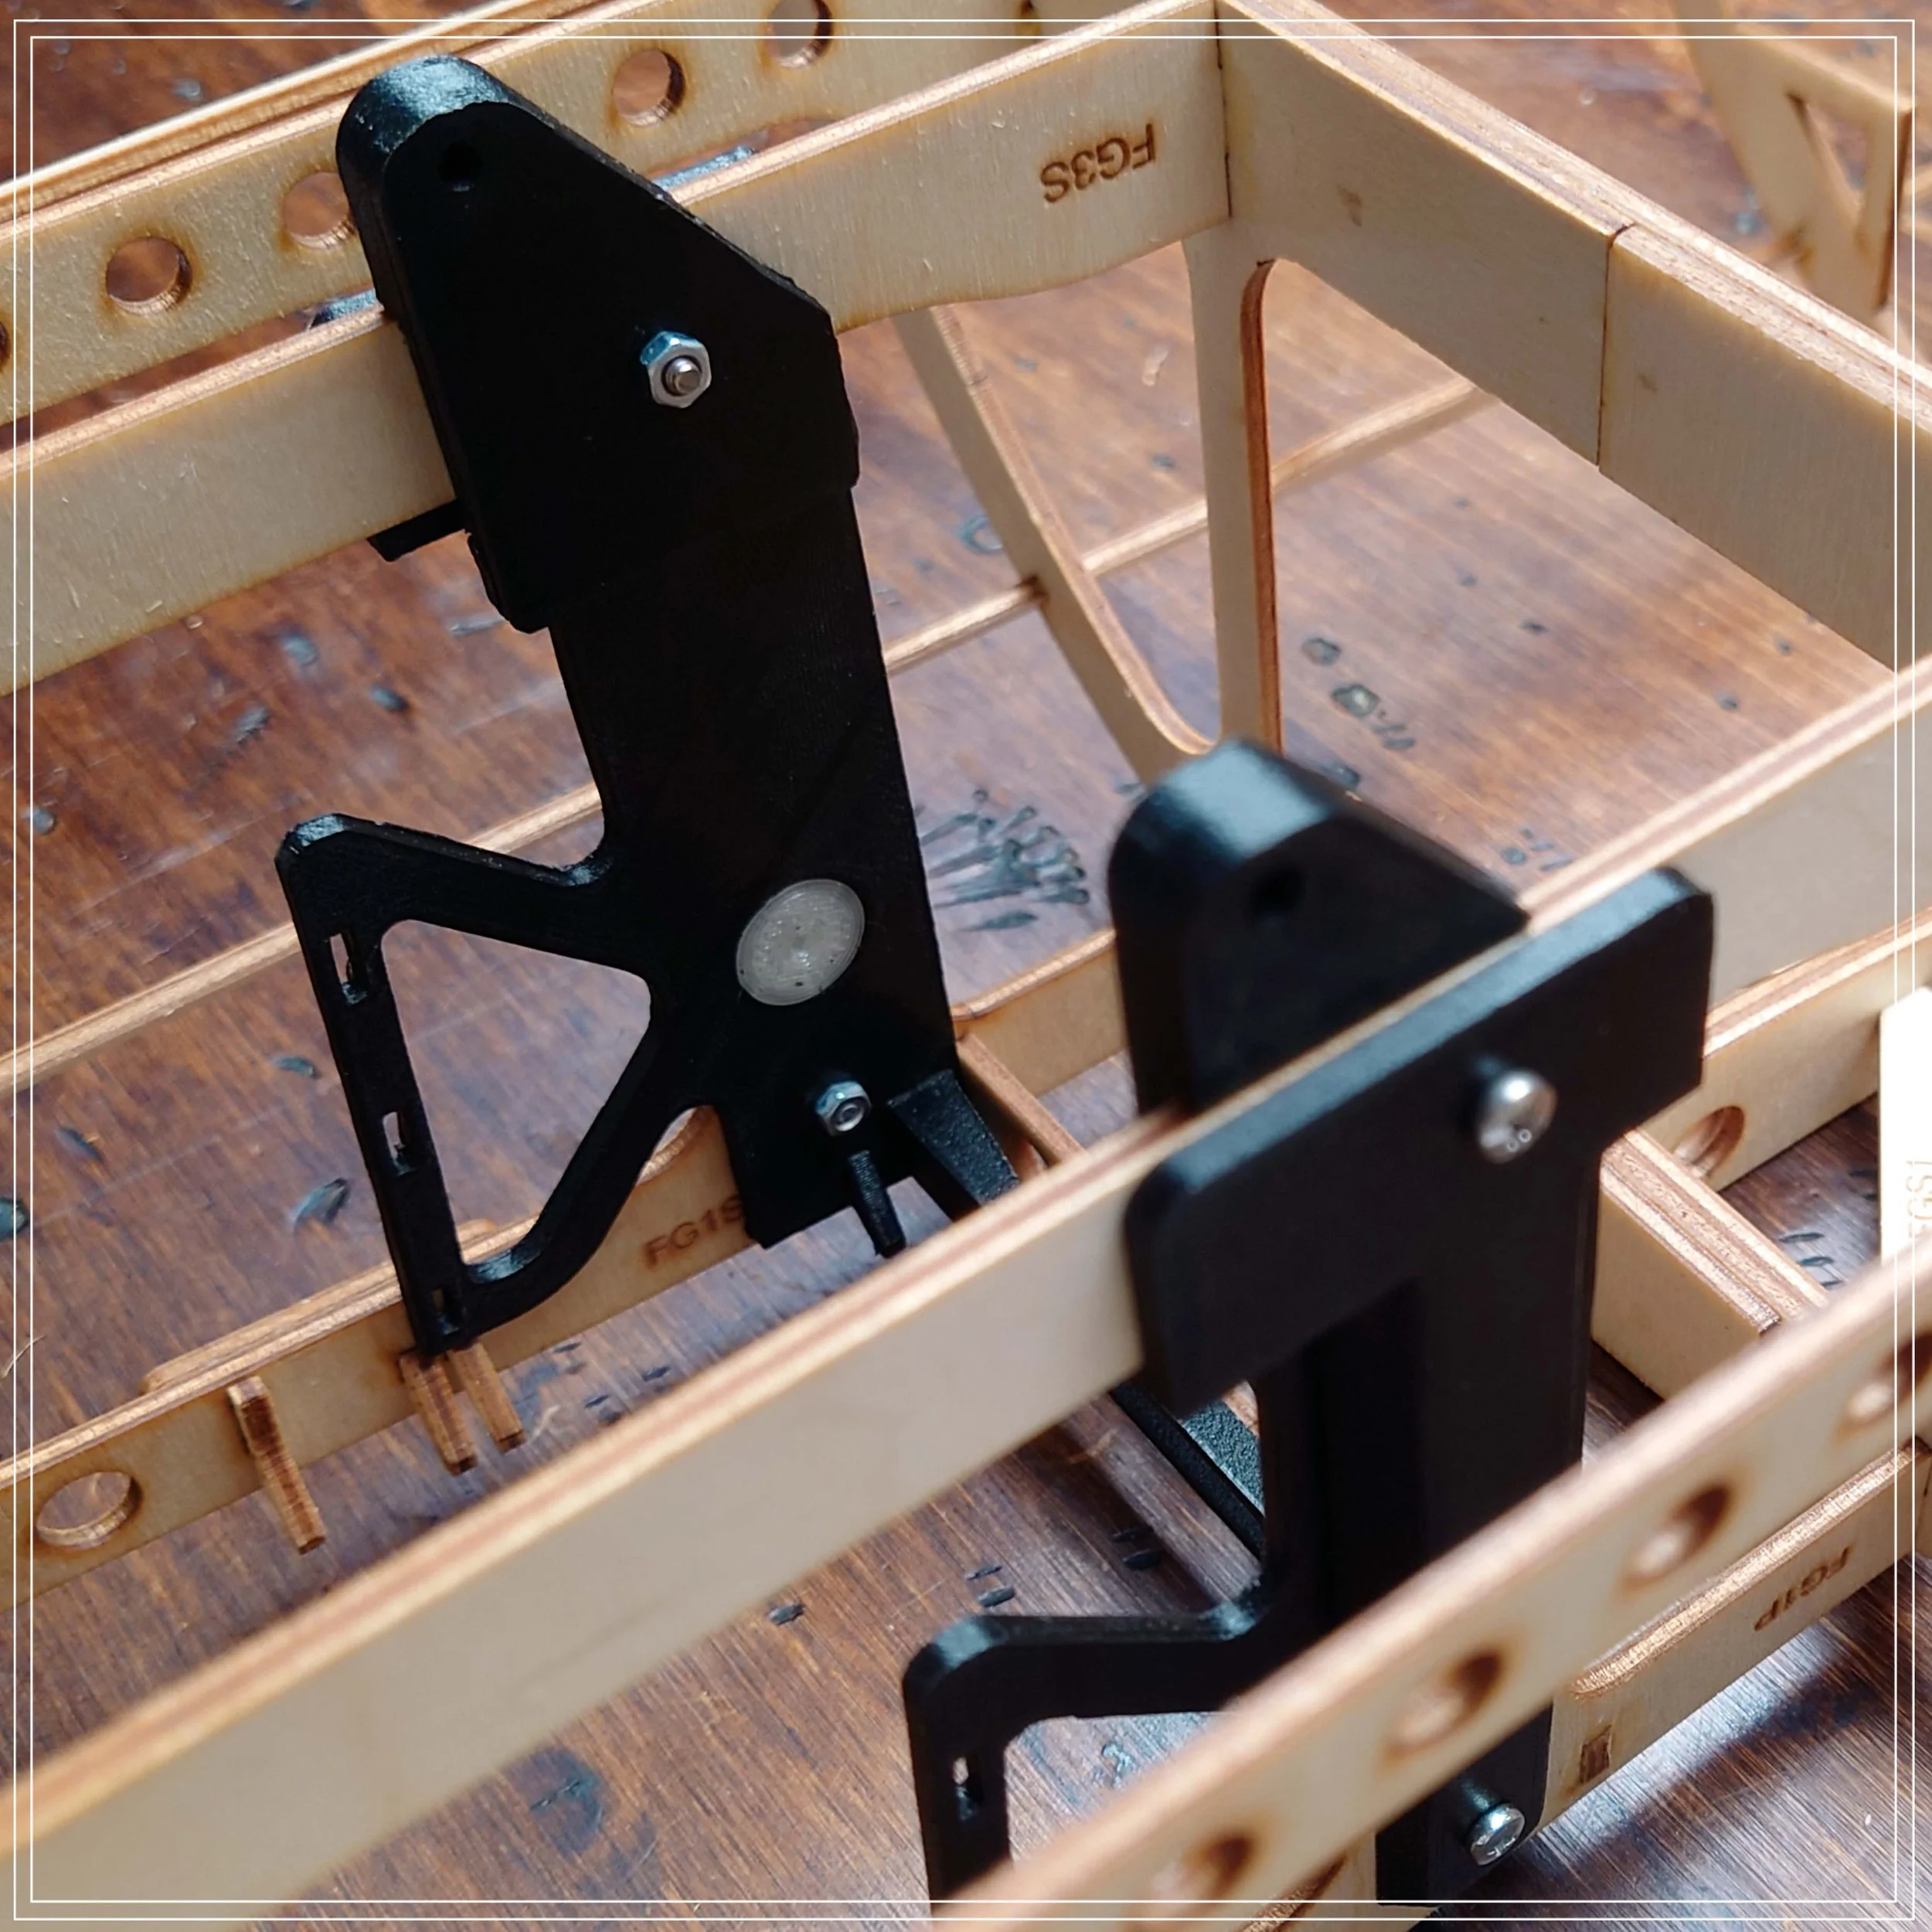
There are two sections of this airplane’s design that have been really challenging. The forward fuselage is definitely one of the two that took far more time than I had anticipated. The reason this section took so much effort is because of the nose gear. The original design was to create a single installable assembly that slides in through the bottom of the fuselage.
Nose Gear Stress Simulation.
See more gear simulations here.
After 3D printing several nose gear prototypes and running simulations on the design it was clear a different design was needed. Without changing the airframe’s internal structure, the new design allows the gear to be mounted using 3D printed columns which affix to the upper and lower gear frame spars.
After several months of designing, prototyping, adjusting, the final structure design was completed and the build was able to continue.
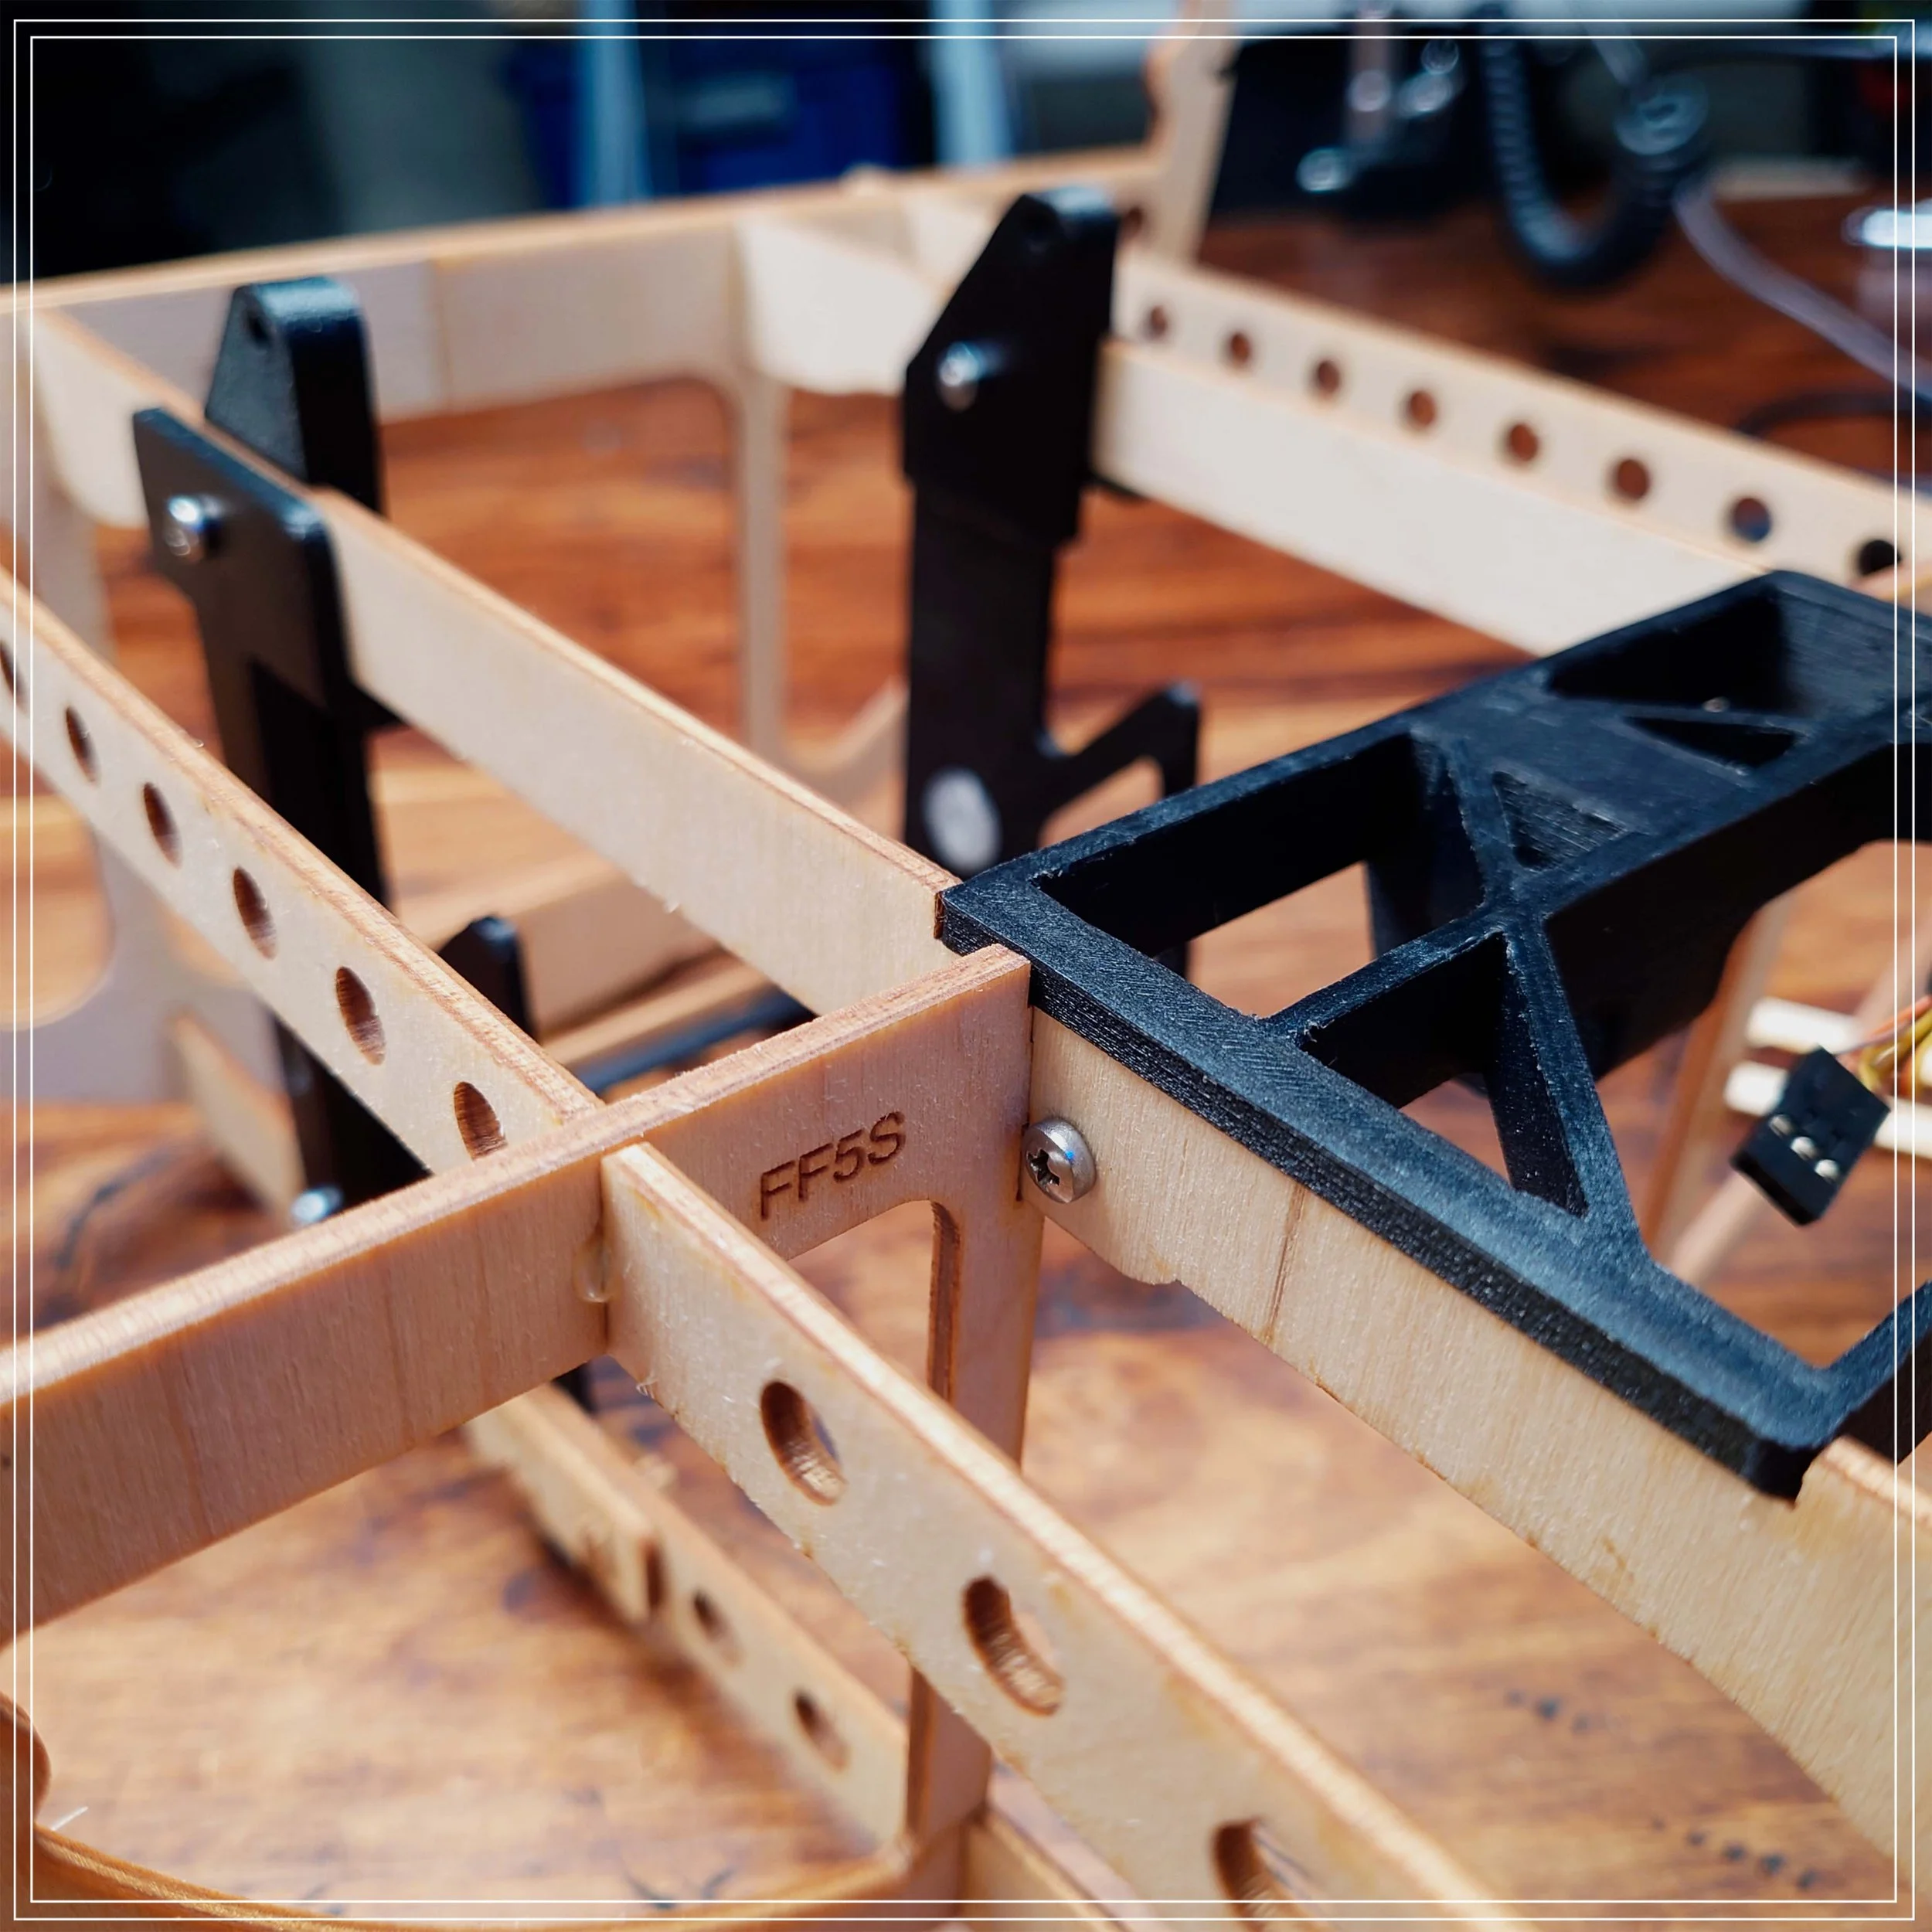
3D Printed Airplane Parts
This airliner’s superstructure is mainly constructed of 3mm birch plywood, but you’ll notice a decent amount of 3D printed parts are incorporated. Those include the access hatch hinges, the hatch latching mechanism, keel mounting sockets, Electronics deck mounting brackets and nose cone mold place holder.
For this model, I opted to go with a hybrid approach to building a large scale model blending 3D printed parts for structural and functional parts while relying on precision laser cut frame for an easier snap together assembly experience.
There is a current trend in the world of RC model planes of 3D printing amazing light weight PLA airplanes. I really love all of this experimentation and amazing planes that have been created! A plane the size of this L-1011, however, could be created this way, but the print time, likelihood of print errors, and short comings of the material which can’t easily withstand high summer temperatures made it a less attractive option. For that reason, the parts you see in the build that are 3D printed, are key functional parts and components.
Pictured in the Mounting Bracket photos is the FrSky HV5701 Servo
Up Close Model Details


Behind the Scenes of this Airliner Build Video


How long did it take to Shoot and Edit This YouTube Build Video?
This is an interesting question because the actual model assembly could have been completed in just 3-4 hours, however, to actually record the video took 6 full days in the build studio. If you’ve had a chance to watch the episode, you know how many angles and shots were included. My goal was to help bring you closer into the project by showing you more of the details and steps involved in the fuselage assembly process. This meant each step of the way had to be captured from various angles. Once each shot was set up, I would do a “rehearsal” to make sure my hand, arm, head, or hat didn’t get in the way and make sure the exposure and focus was correct.
The editing process took about 5 days to complete which resulted in a 253 clip video with a runtime of 20 minutes. Part of the reason it takes so long to edit is sifting through hours of footage, finding the music that I like and can time two and do my best to color match each clip (with varying degrees of success). The final step is adding in the titles and call outs.
The Build Series


